A new phone should feel like a fresh start, not a small panic attack. I have felt both, and the difference was never the phone. It was the order I moved things in. Back up first, move second, check third. That order is what this guide follows, so your photos and chats arrive safely.
That New-Phone Feeling, Mixed With a Small Fear
I still remember the smell of a brand-new phone box. Plastic and promise, and for about ten seconds I feel like a kid on a holiday morning. Then a quieter feeling shows up, harder to ignore. What if my photos do not make it across?
That fear is fair, and I have felt it more than once. My old phone holds years of my life in a small glass box. Family dinners, voice notes from friends, contacts I never wrote down anywhere else, chats I would hate to lose. A new phone should feel like an upgrade, not a gamble.
Here is the good news: moving everything is a lot easier than it used to be, as long as you do it in the right order.
In a Hurry? Here Is What Actually Matters
Back up first, move second, check third. Never skip the check.
Use the phone's own transfer tool first. It is built for this job.
Keep both phones charged and on Wi-Fi until the move is done.
Photos, contacts, and chats each need their own check, not one glance.
Most phones now have a built-in tool that walks you through the move. You do not need to be a tech expert, and you do not need to pay for a fancy app. You just need a charged battery, a steady Wi-Fi connection, and a backup made before you start. That last part is the one people skip, and it is the one that saves you when something goes sideways.
So let me walk you through this the way I would walk a friend through it. We will start with the fear, then the backup, then the easy same-brand move. In the second half, we will switch brands, sort out chats and passwords, and run a simple check at the end. By the time you finish, your new phone should feel like your old phone, only faster.
What I almost lost the first time I switched
My first big switch taught me a lesson I never forgot. I was in a rush, the shop was about to close, and I tapped through the setup screens without reading them. I thought my photos were safe because I could see them on my old phone. I did not check whether they were backed up anywhere else.
Halfway through, the transfer stopped. My old phone ran out of battery, and the new phone sat there with half my contacts and a photo library that looked thin. I felt sick. I had not lost everything, but I had lost time, sleep, and a few photos I could not get back in the same quality.
Do you know what hurt most? It was not the phone. It was the feeling that I had done it to myself by rushing. A ten-minute backup check would have saved me hours of worry. I promised myself I would never skip that step again, and I have kept that promise since.
The one rule that saves every transfer
Do not wipe, sell, or trade in your old phone until your new phone is checked and working.
That is the whole rule. It sounds simple, and it is. But it is also the rule people break most often, usually because a shop offers a good trade-in deal on the spot. Keep the old phone in a drawer for a week. Let the new phone prove itself first.
If a photo is missing, you can still grab it from the old phone. If a chat did not move, you can still try again. Once the old phone is wiped, that safety net is gone. So treat your old phone like a spare key. You may not need it, but you will be very glad it is there if you do.
And here is a second small rule that goes with it: write down your passwords before you start. Not all of them, just the big ones. Your Google or Apple account, your email, and your banking app. You will need to sign in again on the new phone, and guessing passwords in the middle of a transfer is a miserable way to spend an evening.

Back Up First, Even If You Plan a Direct Move
You might ask, why back up if I am going to transfer directly from one phone to the other? It is a fair question. A direct transfer is fast and simple, and most of the time it works. But a backup is your plan B, and plan B is what turns a bad day into a small delay.
Think of it like packing for a trip. You pack your main bag, but you also keep your passport in a separate pocket. If one bag goes missing, you are not stuck. A backup works the same way. If the direct move stalls, if Wi-Fi drops, or if a cable turns out to be faulty, your backup is still there waiting.
On Android, check this one screen
Open Settings, then look for Google, then Backup. You should see a backup that is recent, ideally from today. If the last backup is weeks old, tap Back up now and wait for it to finish. Plug the phone in while you wait, and stay on Wi-Fi.
While you are there, check Google Photos too. Open the app, tap your profile photo, and make sure backup is on. If your photos are set to back up in original quality, that can take longer and use more storage. A standard quality backup is fine for most people, and it is much faster. What matters is that the photos are somewhere other than the old phone alone.
On iPhone, check this one screen
Open Settings, tap your name at the top, then iCloud, then iCloud Backup. Turn it on if it is off, and tap Back Up Now. Again, stay on Wi-Fi and keep the phone plugged in. A first backup can take a while if you have a big photo library, so start it early. I usually start mine while I am making dinner, so it is done by the time I sit down.
One thing to watch: iCloud storage. If your phone says there is not enough space, you have two choices. You can free up space by deleting old backups or large videos, or you can move some photos to another cloud service first. Do not ignore the warning and hope for the best. A backup that never finishes is the same as no backup at all.
A quick story from my own desk: the last time I helped a cousin switch phones, we found his backup was from eight months ago. Eight months of baby photos were only on his old phone. We made a fresh backup before we touched anything else, and I am still glad we did. The transfer later hit a snag with his Wi-Fi, but the backup meant we could simply restore and start again without panic.
If your old and new phones are from the same brand family, you are in luck. This is the easiest kind of move, because the maker built a tool just for it. Samsung, Google, and Apple all do this well, and the steps feel a lot like following a recipe.
Same Brand, Easiest Road First
This is where most people actually start. They open the new phone, they see a friendly setup screen, and they wonder which button to tap. Here is the simple answer: tap the button that says you want to copy data from your old phone. Do not tap "set up as new" unless you truly want a fresh start.
Android to Android, step by step
Turn on your new Android phone and connect it to Wi-Fi. When setup asks if you want to copy apps and data, choose to copy from your old phone. You can connect with a cable or wirelessly. A cable is faster for a big photo library, and it does not depend on your Wi-Fi speed. Wireless is easier if you do not have the right cable handy.
On the old phone, follow the prompts to allow the connection. You will pick what to move: contacts, messages, photos, videos, and apps. I pick all of them, then I let the phone work. Keep both phones close together, plugged in, and awake. Do not use the old phone for calls in the middle of the transfer, because that can slow things down or break the connection.
When it finishes, do not rush to the next step. Open your photo app on the new phone and scroll back a few months. Open your contacts and search for a name you know well. If those look right, you are in good shape. Apps will keep downloading in the background for a while, and that is normal. They may look greyed out at first, then fill in one by one.
If you use a Samsung phone, Samsung Smart Switch can do this job too, with a cable, wirelessly, or through a computer. It is already on most Galaxy phones, and it is worth using if your new phone is a Galaxy. I will link to the official Smart Switch guide in the second half, so you can follow the exact steps for your model.
iPhone to iPhone, step by step
Apple makes this move feel almost like magic, and the feature is called Quick Start. Put your old iPhone next to your new one, with Bluetooth and Wi-Fi on. A prompt should appear on the old phone, asking if you want to set up the new iPhone. Tap Continue, then hold the new phone up so the old phone can scan the swirling animation on its screen.
Then you enter your old passcode on the new phone, and you choose whether to transfer directly or restore from an iCloud backup. A direct transfer is a good pick if you still have the old phone in your hand. It moves almost everything, and it does not need a lot of iCloud space. A restore from iCloud is better if the old phone is already gone or broken.
Either way, keep both phones plugged in and near each other until the transfer finishes. Your new iPhone may look ready before your photos finish downloading, and that is fine. Photos and apps keep arriving in the background while you start using the phone. Just give it time, and do not wipe the old phone yet. Remember our one rule.
A Short Video Walkthrough You Can Follow
Watch this first if you are switching from Android to iPhone: it shows the Move to iOS steps on screen, so you can follow along tap by tap.
The video is "How to Transfer EVERYTHING from Android to iPhone (Full Guide)" by Tech Life Unity. It covers downloading Move to iOS, entering the code from your new iPhone, and picking what to move. Even if you are not switching to an iPhone, watching a real transfer once makes the whole process feel less scary. You will see the screens before you see them on your own phone, and that small preview helps a lot.
Switching Sides Without Losing Your Chats
Switching from Android to iPhone, or the other way around, used to be the move people dreaded most. It felt like moving to a new country where you did not speak the language. These days it is still a bigger job than staying with the same brand, but it is very doable, and the tools are free.
The main thing to know is timing. Cross-platform tools work best during the first setup of the new phone, before you finish setting it up as a fresh device. If you already set up the new phone and skipped the transfer screen, you may need to erase it and start setup again to use the tool. That sounds harsh, but it is better than living with half your chats missing. And remember, erasing the new phone does not touch your old phone, so your safety net is still there.
Android to iPhone with Move to iOS
Download Move to iOS on your old Android phone from the Play Store. Start setting up your new iPhone, and when you reach the Transfer Your Apps and Data screen, choose From Android. A code will appear on the iPhone. Enter that code in Move to iOS on the Android phone, and the two phones will link up.
Next, pick what to move. Contacts, message history, photos, videos, and WhatsApp chats can all come across, along with many free apps. The transfer can take a while if you have a big photo library, so plug both phones in and leave them alone. I once watched a transfer that looked stuck at ninety percent for twenty minutes, then finished all at once. Patience is part of the job here.
One honest limit: paid apps do not transfer as purchases across platforms, and some app data may not carry over. You will need to download those apps again and sign in. That is annoying, but it is normal, and it is not a sign that something went wrong. Your photos and chats matter most, and those are the parts this tool handles well.
iPhone to Android with Switch to Android
Going the other way, start setup on your new Android phone and choose to copy data from an iPhone. You will usually scan a QR code with your old iPhone, or connect the two phones with a cable. The Switch to Android app on the iPhone guides you through it, and it can move photos, videos, contacts, and messages.
Before you start, turn off iMessage on the old iPhone. This is a small step that saves a big headache. If you do not turn it off, texts from iPhone friends may keep going to your old phone instead of your new Android phone, and you will wonder why replies stop coming. Go to Settings, then Messages, and turn iMessage off. Do the same for FaceTime if you use it.
Also, check your photo library size before you start. iPhone photos can be large, and a cable transfer will be faster than wireless if you have tens of thousands of them. If you use a cable, make sure it fits both phones. A USB-C to USB-C cable works for newer models, while an older iPhone may need a USB-C to Lightning cable. Borrow one if you need to, rather than starting a slow wireless transfer and regretting it halfway through.
The Stuff That Does Not Move by Itself
Here is the part most guides skip, and it is the part that causes the most surprises. A phone transfer moves a lot, but it does not move everything. Some things live in separate accounts, some need a fresh sign-in, and some need a backup of their own. Knowing this before you start means you will not panic when you notice a gap.
WhatsApp, photos, and passwords
WhatsApp deserves its own backup check. On Android, open WhatsApp, go to Settings, then Chats, then Chat Backup, and tap Back Up. On iPhone, the same screen backs up to iCloud. If you are moving between the same platform, restoring that backup on the new phone should bring your chats back. If you are switching platforms, use the built-in move flow during setup, as I described above, and do not set up WhatsApp as fresh first.
Photos are a second trap. If your photos are backed up to Google Photos or iCloud Photos, they will come back when you sign in on the new phone, even if the direct transfer missed a few. But if your photos were only on the old phone, and you never turned backup on, the direct transfer is your only copy. That is why the backup step in Part 1 matters so much. Check it, do not just assume it.
Passwords are the third piece. Many passwords now live in your Google or Apple account, or in a password manager app. Sign in to that same account on the new phone, and most of them should return. But some apps store passwords only on the device, and those will ask you to sign in again. Keep a note of the important ones, and do not rely on your memory in the middle of a busy setup day.
Banking apps and two-step codes
Banking apps almost always ask you to sign in again, and sometimes they ask for extra proof that it is really you. That is a good thing, even if it feels like a hassle. Have your bank card handy, and be ready for a code by text or email. Do not try to rush this part while the transfer is still running. Wait until the phone is settled, then sign in to one banking app at a time.
Two-step codes need special care. If you use an authenticator app, check whether it backs up to the cloud or only lives on the old phone. Some authenticator apps let you transfer accounts to a new phone with a QR code or a cloud backup. Others do not, and you may need recovery codes for each account. Before you wipe the old phone, open your most important accounts and make sure you can still sign in from the new phone. Email, banking, and your main social accounts come first.
I learned this the hard way with a work account. I wiped an old phone, then found I could not sign in to a tool I needed that same morning. I had to call support and wait two days for a reset. Now I test my logins before I wipe anything, and I keep recovery codes in a safe place that is not on either phone. A paper note in a drawer works, as long as you know where the drawer is.
The Day-After Check That Catches Missing Pieces
Do not call the move done on the night you set up the new phone. Call it done the next day, after a simple check. Transfers can look complete while photos are still downloading in the background, and a quick check the next morning catches the gaps while your old phone is still there to fill them.
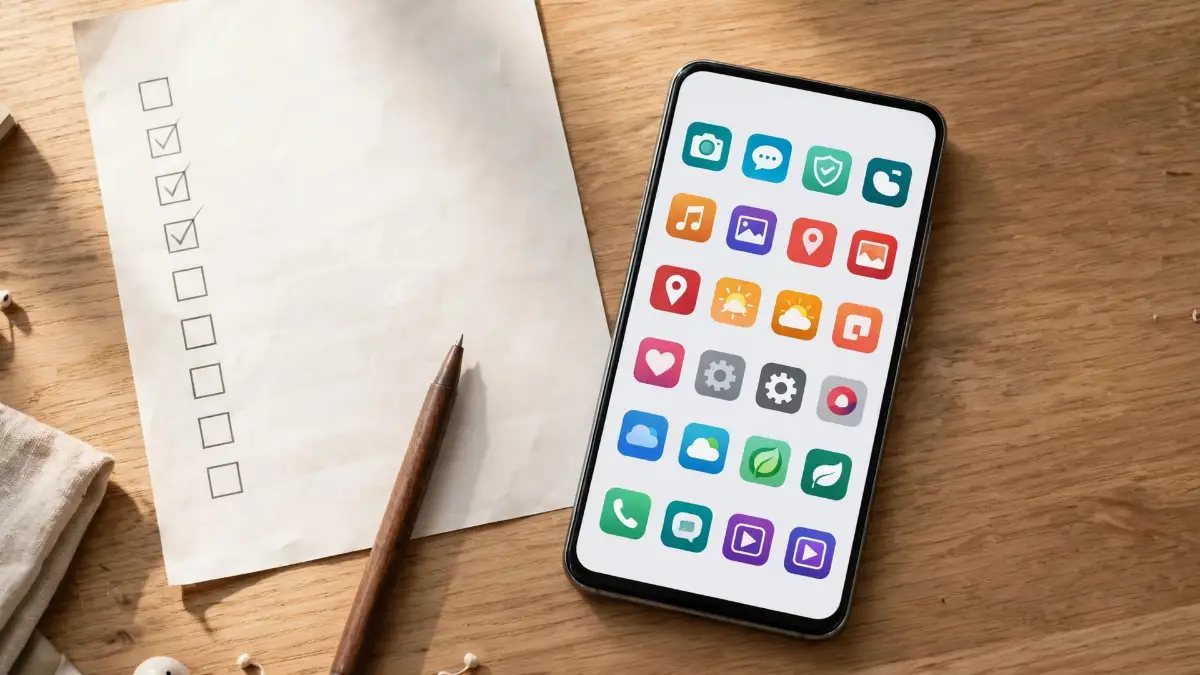
A simple checklist you can run in ten minutes
Start with photos. Open your photo app, scroll to the oldest photos you care about, and check that they are really there, not just grey placeholders. Then check a recent photo too. If both ends of your library look right, the middle is very likely fine.
Next, check contacts. Search for three people: a family member, a work contact, and someone you rarely call. If all three are there with the right numbers, your contacts moved well. Then open your main chat app and look for a conversation from last week. If the messages and photos in that chat are there, your chats moved well.
Then check apps. Open your banking app, your email, and your most-used social app. Sign in where needed, and make sure each one works. Check that notifications arrive, because a silent phone is a sign that a setting did not carry over. Finally, make a test call and send a test text to a friend. If the call connects and the text arrives, your SIM and network are working as they should.
If something is missing, do not panic and do not wipe the old phone. Try the transfer for that one item again, or restore it from its own backup. Photos can come from Google Photos or iCloud. Chats can come from a WhatsApp backup. Contacts can come from your Google or Apple account. One missing piece is a fixable problem, not a failed move.
Helpful Links for Your Move
Here are the internal guides on this site that pair well with a new phone setup, and a few trusted outside guides for the brand tools. The internal links use natural anchors, so they read like normal advice, not a list of links.
If your new phone feels hot while it downloads everything in the background, read about why your phone overheats and how to fix it. If it charges slowly while it is busy restoring, the guide on why your phone charges so slowly explains what is normal and what is not. A fresh transfer is also a good time to check your phone battery health, because a weak battery makes a long transfer harder.
Before you move, you may want to free up storage on your old phone without deleting your photos, so the transfer is smaller and faster. If your old phone keeps restarting during a backup, read why your phone keeps restarting and the proven fixes first, so the backup finishes cleanly. And once you are on the new phone, stay safe by learning how to tell if your phone has been hacked, since a fresh setup is a good moment to review permissions.
For the brand tools themselves, Samsung explains Smart Switch transfer and backup on its own support site. For WhatsApp specifically, a clear guide to transfer WhatsApp to a new phone with the same number walks through the backup and restore steps. If you are moving iPhone to iPhone, this step-by-step iPhone to iPhone transfer guide covers cable and iCloud options. And if you want to move chats without a cloud backup, read about transferring WhatsApp messages to a new phone without a backup.
Questions I Hear Every Time Someone Switches
Will I lose my photos if the transfer stops halfway?
No, not if you made a backup first. Your photos stay on the old phone until you wipe it, and a backup gives you a second copy. Start the transfer again, or restore from the backup, and check your photo library the next day before you wipe anything.
Can I transfer from Android to iPhone without a computer?
Yes. Move to iOS works phone to phone, with no computer needed. You just need both phones, Wi-Fi, and enough battery. A computer can help for a very large library, but most people do not need one.
Do my paid apps move to the new phone?
Apps you paid for on the same platform usually restore when you sign in with the same account, though you may need to download them again. Across platforms, paid apps do not carry over as purchases, so you may need to buy them again on the new platform. Check your most-used paid apps before you switch, so there are no surprises.
What if I already set up the new phone as fresh?
You can still move a lot by hand: sign in to your cloud accounts, restore WhatsApp from its backup, and download your apps again. But for a full transfer tool, you may need to erase the new phone and start setup again. That is a hassle, but it is often the cleanest way to get everything across in one go.
Should I keep my old phone after the move?
Yes, for at least a week. Keep it charged and do not wipe it until you have checked photos, contacts, chats, and logins on the new phone. Once everything checks out, then you can wipe it and trade it in or pass it on.
How long does a full transfer take?
It depends on how much you have. A small transfer can finish in under an hour. A big photo library can take several hours, especially on wireless. A cable is faster, and doing it overnight while both phones are plugged in is often the easiest plan.

Before You Hand the Old Phone Over
You have done the hard part now. You backed up, you moved, and you checked. Your new phone should feel familiar, with your photos, your contacts, and your chats in place. Take a moment to enjoy that, because a new phone is supposed to be fun, not stressful.
When you are ready to let the old phone go, wipe it properly. Sign out of your Google or Apple account first, then erase all content and settings. That step protects your data and lets the next owner set the phone up cleanly. Do not just delete a few photos and hand it over. A full erase is quick, and it is the safe way to finish.
And if you ever switch again, you will know the rhythm by heart. Back up first, keep the old phone, move in the right order, and check the next day. That rhythm has saved my photos more than once, and I hope it saves yours too.
Disclaimer: This guide is for general information only. Transfer steps can vary by phone model and software version, so follow the on-screen prompts on your own devices. Always make a backup before you transfer or erase a phone, and keep your old phone until you have checked the new one. If you use banking or work accounts, check their sign-in and two-step settings separately before you wipe the old phone.