
That Chilling Moment Your Memory Card Begs for a Format
You plug your camera card into your laptop, take a sip of coffee, and wait for your photo album to load. Instead, a blunt warning pops up asking you to format the drive before doing anything else. Whatever you do right now, keep your hands off that format button. Your pictures are almost certainly sitting right on the flash memory chips, and you can pull them back safely without wiping a single file.
Most people make their biggest mistake right at this very second. The prompt makes it sound like formatting is a harmless repair step that gets the card back to normal. In reality, agreeing to that format command strips away the hidden markers that keep your photos intact. The feeling of helplessness is real, but you do not have to give up on your pictures just yet.
Panic usually pushes us to try random buttons or pull the card out abruptly. I almost yanked the card out of the slot myself, which could have snapped the internal memory chips permanently. When your computer claims your memory card is blank or broken, it rarely means your photos have vanished into thin air. The pictures are almost always sitting right where you left them, quietly waiting behind a broken digital doorway.

Emergency Playbook: Before You Touch Any Settings
- Step Away from the Format Button: Formatting resets your file table and makes rebuilding raw images substantially harder.
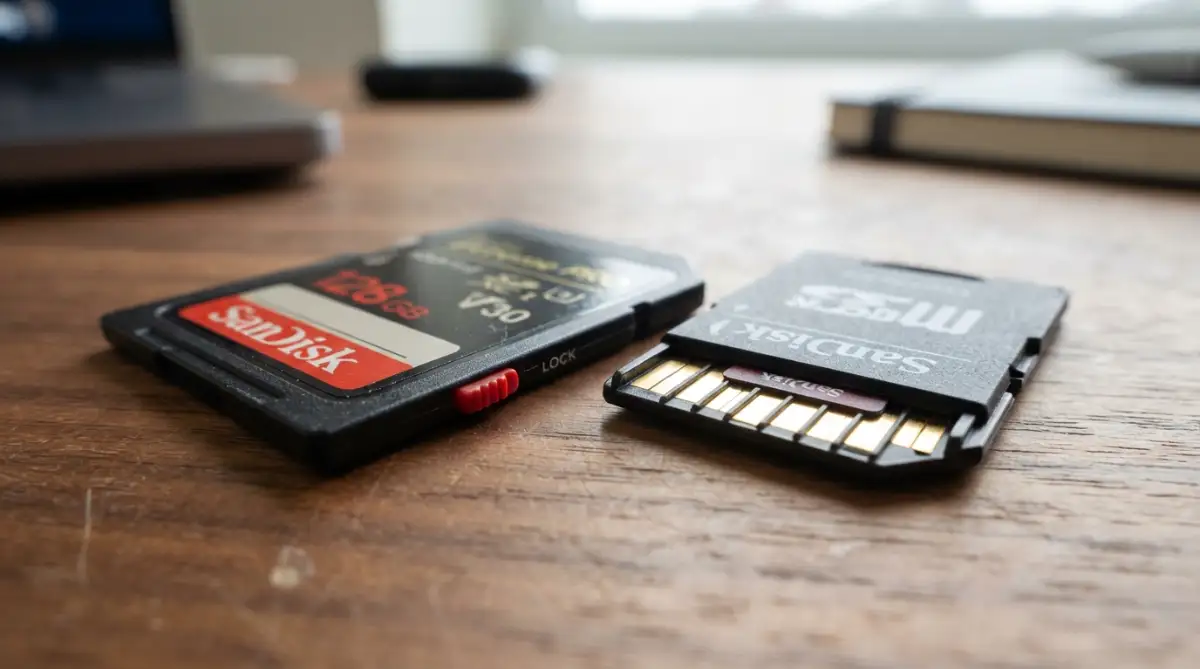
- Flip the Physical Lock: Slide down the tiny tab on the left edge of your SD card to stop your operating system from writing background files.
- Clone First, Scan Second: Make a byte-level disk image of the card on your hard drive so your deep recovery scans do not stress aging flash cells.
- Bypass the Camera Cord: Never scan a card while it is connected inside a camera; always use an external USB card reader connected to a steady computer port.
The Secret Anatomy of Memory Cards and Deleted Files
If you want to understand what actually happens when a photo is deleted and whether it can still be recovered, read can permanently deleted photos be recovered.
To rescue your pictures, you must first understand what actually happens when a photo gets deleted or locked away. Think of your memory card like a massive physical book filled with thousands of stories. At the very front of the book lies a table of contents, known in computer terms as the file system directory. When an error occurs or when you press delete, the device simply erases the chapter line from the table of contents.
The actual pages of the book—the raw image data of your vacation, birthday, or graduation—remain untouched on the storage chips. Your computer simply marks those storage sectors as open space where new information can be written whenever needed. As long as you do not take new photos or write fresh files to that card, your original pictures remain completely safe. This is why immediate action and gentle handling give you an extraordinarily high chance of a complete recovery.
Why does your operating system demand a format in the first place? Memory cards rely on delicate file structures like FAT32 or exFAT to communicate with phones, cameras, and computers. If you turn off your camera while it is saving a shot, or pull the card out without safely ejecting it, that index file can get scrambled. Your computer cannot read the scrambled index, so it assumes the card is blank and recommends a brand-new format.
For a deeper explanation of why deleted photos can appear to disappear from an SD card, read why deleted photos disappear from an SD card.
- [File Directory (Index)] ---> Corrupted or Blank
- [Raw Image Blocks] ---> Still 100% Intact on Flash Memory
When you understand this separation between the index and the actual image data, your panic turns into a clear plan. You do not need the broken index to reconstruct your lost photographs. Specialized diagnostic tools can scan past the broken front door and rebuild your pictures piece by piece directly from the storage chips. Knowing this simple truth protects you from making rushed decisions that could overwrite your files permanently.
For a complete step-by-step recovery process, see our guide on how to recover deleted photos from an SD card safely.
Flash Memory Myths vs Practical Reality
Shielding Your Storage Before Attempting Any Fix
Before you open any diagnostic program or click any settings, you must physically protect your memory card from new writes. Look at the left side of your full-sized SD card, and you will spot a tiny plastic switch known as the lock slider. Sliding this tab downward into the locked position turns the memory card into a read-only device. This physical barrier ensures your computer cannot write background system files onto the card while you inspect it.
If you are using a micro SD card, look at the plastic adapter you slide it into. Most brand-name adapters feature this exact same write-protection switch on their left edge. Locking the adapter provides the identical safety shield for your tiny micro card. It takes two seconds to slide that tab down, but it guarantees that accidental clicks will never harm your original files.
Next, remove the card from the camera or phone and set it on a clean, dry surface. Never attempt to run recovery procedures while the card is still inside your camera connected via a weak USB cord. Cameras often throttle data speeds or shut down unexpectedly on battery power, which can corrupt the memory card even worse. A dedicated USB card reader plugged directly into your computer provides steady power and reliable communication.
Restoring Access by Reassigning the Drive Path
Sometimes your files are not damaged at all; your operating system has simply lost track of where the card lives. Operating systems assign an alphabet letter, like E, F, or G, to every external storage unit you plug in. If your computer accidentally tries to give your SD card a letter already claimed by a hidden drive or network folder, the card becomes invisible or throws errors. Giving your card a brand-new drive letter can instantly clear the blockage without touching a single photo.
To test this, plug your card reader into your computer and open your system's built-in disk management window. You will see a list of every internal and external drive currently recognized by your hardware. Locate your SD card in the lower panel by matching its storage size with your card's capacity. Right-click on the card volume and choose the option to change the drive letter and paths.
Pick an unused letter from the far end of the alphabet, such as M, R, or X, and confirm your choice. This forces your operating system to build a fresh communication link directly to the memory card. Close the window and open your standard file browser to see if your photos are now accessible. This quick change solves a surprising number of unreadable card problems without risking any data loss.
Here is a quick guide to what your computer is actually seeing when it throws an error:
- Windows Status: RAW Format | Meaning: The file directory is scrambled, but raw photos are intact | Action: Reassign a drive letter first, never click format.
- Windows Status: Unallocated Space | Meaning: The partition header is missing or damaged | Action: Build a byte-level disk clone before running deep diagnostics.
- Windows Status: Write-Protected | Meaning: Physical slider is down or the controller entered safe mode | Action: Check the physical switch on the side of the card or adapter.
Safe System Diagnostics to Rebuild the File Bridge
If changing the drive letter does not reveal your pictures, the underlying file bridge might have small sector glitches. Your computer comes with built-in diagnostic utilities designed to patch damaged index structures without erasing user files. When applied with the correct command flags, these tools simply inspect the card, find detached fragments, and stitch the index back together.
Open your system's command prompt by typing command into your main search bar and running it with administrative privileges. You will see a clean, dark window where you can type direct instructions to your computer. Type the diagnostic command followed by your card's specific drive letter, a colon, and the repair switch. The exact phrase looks like this: chkdsk E: /f (replace the letter E with your card's actual drive letter).
The repair switch tells your machine to scan the card for structural errors and mend them in place without formatting the drive. Press enter and let the process run its course without touching the keyboard or bumping the card reader. The utility will inspect file allocation tables, verify directory entries, and reconnect lost clusters. If the damage was confined to basic file system errors, your photos will reappear in your browser the moment the scan finishes.
I once spent three hours sweating over an unreadable card before remembering to check the drive letter conflicts on my desktop. My system had tried to assign the letter D to my camera card, which was already reserved for a virtual drive. Changing the letter took me forty seconds and brought back every single photo without running any complex software.
Watch this comprehensive visual walkthrough to see these recovery steps executed smoothly in real time:
Generating a Raw Clone to Guarantee Total Safety
When dealing with precious memories, working directly on the original memory card always carries a tiny bit of risk. If the memory card has physical wear or degrading flash memory cells, repeated scanning can wear it down further. Professional recovery specialists always create a sector-by-sector copy—known as a disk image—before running deep recovery tools. A disk image is an exact digital clone of every single byte on your memory card saved as one single file on your main hard drive.
You can create this clone using free, trustworthy disk imaging tools that do not alter the source media. Once the clone file is created, you can unplug your original SD card and store it safely in a desk drawer. You can then run every search, scan, and recovery attempt directly against the image file saved on your computer. If anything goes wrong during your recovery experiments, your original memory card remains completely untouched and ready for another try.
To make an image, ensure your computer's internal hard drive has enough free storage space to match your card's total capacity. If you have a sixty-four-gigabyte SD card, your computer needs at least sixty-four gigabytes of free room. Connect your card, launch your disk cloning utility, select your memory card as the source, and choose a folder on your hard drive as the destination. Let the software read each sector sequentially until the copy finishes completely.
Deep Scanning Without Touching the File System
When standard system tools cannot rebuild the corrupted index, dedicated recovery utilities provide the ultimate safety net. These applications ignore the damaged file system entirely and perform what experts call a raw signature scan. The utility reads the raw binary data across every memory sector, hunting for the unique digital headers that identify picture files. Every JPEG, PNG, or RAW photo file begins with a specific pattern of bytes that acts like an unmistakable signature.
When the scanner discovers a photo signature, it reads forward until it locates the matching footer marker that signals the end of the image. It then gathers all those intervening data packets and reassembles them into a brand-new image file on your hard drive. Because this process only reads from the damaged card and writes exclusively to your computer's internal drive, it is completely non-destructive. Your troubled SD card is never modified, written to, or altered in any way during the entire scan.
Start by downloading a reputable, standalone data recovery scanner that does not bundle third-party junk or aggressive ads. Point the scanner specifically at your external SD card drive or at the disk image file you created earlier. Choose the deep scan or comprehensive scan option to ensure the software inspects every corner of the storage chips. Deep scans take more time—often between thirty minutes and two hours depending on card size—so keep your computer plugged into steady power.
Once the scan finishes, the software will display a structured list of all discovered image files, often organized by camera brand or file type. Most quality recovery tools include a built-in preview pane that lets you see the photo before you extract it. Browse through the thumbnails to confirm that your images are clear, sharp, and free from gray bars or distortion. Select the pictures you wish to keep and save them directly onto your computer's main storage drive, never back onto the troubled SD card.

Understanding Why Formatting Must Be Avoided at All Costs
People often ask why operating systems are so quick to suggest formatting when a card runs into trouble. From the computer's perspective, an unreadable memory card is simply an unorganized piece of raw hardware. The operating system does not know or care that your daughter's first steps or your best friend's wedding photos are stored on those chips. Its primary job is to make the storage hardware usable for new files, and formatting is the quickest way to lay down a fresh playing field.
A standard quick format wipes out the entire file allocation table and replaces it with a completely empty directory structure. While a quick format does not immediately overwrite the binary image data underneath, it scrambles the pointers so badly that recovering complex RAW images becomes vastly more difficult. A full format goes one step further by writing zeroes across every single sector, permanently destroying every photograph beyond any hope of rescue.
Resisting that initial format prompt is the single smartest decision you can make when an error strikes. Even if your camera screen insists that the card is unusable, keep your cool and turn the power off. The card is simply experiencing a temporary language barrier between its internal controller and your display device. Treating the card gently and keeping it isolated from write commands preserves your photographs until you can apply the safe extraction methods explained here.
Checking Hardware Connections and Card Readers
Sometimes the problem does not lie within the SD card at all, but rather inside the physical card reader you are using. Memory card readers contain dozens of microscopic gold-plated pins that must maintain firm contact with the card's metallic pads. Over time, dust, lint, and pocket grime can settle over these contact pads, creating an uneven electrical connection. When electrical signals drop out mid-transfer, your computer misinterprets the sudden drop as card corruption.
Take a bright light and closely examine the metallic contact strips on the back of your SD card. If you see smudges, skin oils, or dull spots, clean them gently using a clean microfiber cloth or an electronics-grade foam swab lightly dampened with isopropyl alcohol. Allow the contacts to air-dry completely for two minutes before inserting the card back into your reader. Never use metal pins, abrasive pads, or tap water to clean the delicate gold contacts.
It is equally beneficial to test the card in a completely different card reader or on another computer. Built-in laptop SD slots are notorious for collecting dust bunnies that bend the internal connector pins out of alignment. Trying an external, high-quality USB card reader plugged into a rear motherboard port eliminates power fluctuations that trigger format messages. You might discover that your card reads perfectly on another machine, proving that your photos were never in danger at all.
Safe Extraction Workflow Summary
To keep your thoughts organized when handling an unreadable memory card, follow this clear order of operations:
- Halt All Write Activity: Turn off your camera or phone immediately and remove the card.
- Engage the Write-Protect Lock: Slide the side tab down to lock the card against incoming data.
- Inspect Physical Contacts: Clean away dust and oil from the gold pins with a microfiber cloth.
- Test on an Alternative Port: Plug into a different computer or a dedicated USB reader to rule out hardware faults.
- Check Drive Letter Paths: Use your computer's disk utility to assign a new, unused drive letter.
- Run Non-Destructive System Checks: Execute read-only diagnostic commands to mend simple index errors.
- Create a Byte-Level Clone: Save an exact disk image to your internal drive before running deep scans.
- Extract via Signature Scanning: Use read-only recovery utilities to reassemble raw photos safely onto your computer.
Following these calm, deliberate steps transforms a chaotic data scare into an orderly recovery project. You do not need expensive commercial contracts or destructive quick fixes to regain your digital photos. By respecting how flash memory stores your pictures and keeping the format command at bay, you retain complete control over your memories. Take your time, proceed methodically, and your photo collection will soon be right back where it belongs.
Pro-Level Secrets for Unlocking Stubborn Memory Cards
Flash memory engineering holds several hidden mechanics that ordinary users rarely hear about. Inside your SD card sits a tiny brain called a memory controller, which manages where electric charges are placed across microscopic silicon gates. When this controller gets confused by dirty power or interrupted writes, it locks the card into an emergency read-only status. Knowing how to work with this controller instead of fighting it gives you the upper hand during a recovery attempt.
Many photographers do not realize that flash storage relies on internal wear-leveling algorithms to spread data evenly across memory cells. When you accidentally erase a picture, the controller does not instantly scrub the flash gates clean. You can explore how can permanently deleted photos be recovered through the lens of flash storage physics to see how electric charges linger on undisturbed NAND chips. Because these charges remain physically stable for months, patience is your greatest ally.
One effective strategy used by laboratory technicians involves lowering data bus speeds during extraction scans. High-speed transfers push memory controllers hard, which can trigger automatic shutdowns on an unstable card. By plugging your USB card reader into an older USB 2.0 port instead of a high-speed slot, you force the hardware to communicate at a slower, steadier pace. This gentle transfer rate often bypasses timeout errors and lets scanning programs read bad sectors without dropping the connection.
Another expert trick revolves around matching the exact file format used by your camera. Most modern cards over thirty-two gigabytes utilize exFAT, while smaller cards run on standard FAT32 systems outlined by the SD Association standards. When an operating system misidentifies an exFAT card as raw storage, it throws an error because it cannot locate the initial boot sector. Reading the card through open-source diagnostic utilities allows you to inspect the secondary backup boot sector, which often stays completely uncorrupted.
Thermal management plays a surprising role when dealing with partially failing memory cards. Flash memory controllers heat up quickly when attempting to read difficult sectors repeatedly, leading to hardware throttling. If your memory card feels hot to the touch during a deep scan, pause the operation immediately and let it cool down in a room with steady airflow. Keeping the card cool prevents thermal expansion from breaking microscopic wire bonds inside the memory casing.
You should also avoid traditional drive maintenance routines like defragmentation on any flash storage device. Running defragmentation tools wears down memory cells by moving thousands of blocks unnecessarily, which can destroy the very photos you want to rescue. In fact, reviewing guidelines on defragmenting and trimming flash memory will show you why solid-state media handles data organization entirely differently from mechanical platters. Flash memory requires zero defragging, and skipping this step protects your card from unnecessary stress.
For future projects, establish a routine of formatting your cards exclusively inside the camera you plan to use, never on your computer. Cameras build their own tailored folder hierarchy and cluster sizes, ensuring optimal write speeds during continuous shooting. Formatting in the camera right before an event resets the internal pointers cleanly without leaving fragmented junk behind. This single habit prevents ninety percent of the read errors that lead to terrifying format popups later on.

Costly Blunders That Permanently Destroy Lost Photos
The biggest danger during a data emergency is not the initial card glitch, but the hasty actions people take while stressed. Panic leads to erratic choices, and clicking the wrong button can turn a recoverable card into a blank slate. Understanding what not to do is just as valuable as knowing the right diagnostic steps. Avoiding these common traps keeps your precious images safe while you work through the solution.
Before starting a recovery attempt, review the SD card recovery mistakes you should avoid to reduce the risk of permanent data loss.
The most catastrophic error is clicking "Format" under the mistaken belief that you can undo it immediately afterward. While basic file carving tools can sometimes pull standard JPEG files from a quick format, complex RAW photo files rarely survive intact. RAW formats scatter image metadata across multiple blocks, and wiping the file allocation table makes reassembly nearly impossible. You should never view formatting as a troubleshooting step when files are missing.
A practical tip for anyone shooting RAW files on Sony, Canon, or Nikon cameras: raw photos always contain an embedded full-resolution JPEG preview inside their headers. If an extraction tool shows your original raw files as corrupted or unopenable, run a dedicated thumbnail extraction tool. You can often rescue these embedded JPEGs with zero loss in visual quality, saving your client delivery or family album even when the raw sensor data is fragmented.
Another frequent misstep is continuing to take pictures on a card after realizing previous files disappeared. Every new snapshot you capture writes fresh binary data directly over the unallocated sectors where your lost photos are waiting. Once new data overwrites those physical memory gates, no software on Earth can rebuild the original image. If you suspect missing pictures, pull the card out instantly and switch to a spare.
Many well-meaning users also make the mistake of installing smartphone apps that promise instant one-click memory card recovery. Mobile operating systems enforce strict sandboxing rules that restrict how deeply apps can interact with external micro SD storage. Worse yet, these apps often cache thumbnails directly onto the memory card itself, overwriting the very pictures you are trying to rescue. Always handle data retrieval on a desktop or laptop computer using dedicated, read-only utilities.
Using aggressive system repair commands without understanding their switches is another dangerous trap. For example, running the standard disk check utility with write-repair flags on a physically failing card can force the system to delete unreadable index entries permanently. Guidelines published by the National Institute of Standards and Technology emphasize that data preservation requires non-destructive bitstream copies before any repair utility modifies media sectors. If a sector cannot be read cleanly, aggressive utilities simply clear the orphaned data, vanishing your pictures forever.
We also see people saving recovered photos directly back onto the exact same damaged memory card during the scan. This creates an immediate overwriting loop where the first rescued picture might destroy the second picture sitting in the next sector. Always specify an external hard drive, a secondary flash stick, or your main computer desktop as the destination folder for rescued files. Keeping the destination completely separate from the source is a golden rule that cannot be broken.
Finally, do not trust cracked or pirated recovery programs downloaded from shady corners of the web. These files frequently carry malware that encrypts files or damages drive partitions beyond repair. Relying on reputable, legitimate recovery utilities protects your personal system and preserves your files without unexpected disasters. Sticking to proven, authentic methods ensures that your recovery journey remains completely safe from start to finish.
Safe Rescue Actions vs Harmful Quick Fixes
- Do: Flip the physical write-protect lock on your card adapter before plugging it into any computer.
- Don't: Take test photos to see if the camera can still write to the memory card.
- Do: Save all retrieved images onto an internal hard drive or secure secondary storage.
- Don't: Save recovered files back onto the same card you are currently scanning.
- Do: Inspect and clean dusty gold contact pins with a dry, lint-free microfiber cloth.
- Don't: Run aggressive automated disk repair tools without making a raw sector clone first.
Long-Term Memory Card Care and Data Defense
Rescuing your current batch of lost photos is a massive relief, but setting up a reliable safety routine prevents future heartaches. Memory cards are temporary transfer devices, not permanent storage vaults for your life memories. Developing healthy digital habits ensures that you never find yourself staring at an unexpected format prompt ever again. A few simple adjustments to your everyday workflow will keep your digital archives completely safe.
Start by practicing the widely recommended 3-2-1 backup strategy for every image you value. Keep three separate copies of your pictures across two different media types, with at least one copy stored offsite. Integrating modern cloud storage solutions into your weekly routine provides an automated offsite shield that protects you against hardware failure, theft, or physical card damage. Once your photos live in multiple secure locations, an unreadable memory card becomes an easy fix instead of a tragedy.
Pay attention to how your computer handles write caching on removable media. Operating systems often delay writing data to an SD card to boost perceived transfer speeds, holding information in system memory. If you pull the card before that cache finishes clearing, the file directory becomes corrupted instantly. Always click the safe eject icon in your system tray and wait for the confirmation message before pulling your card out.
It is also wise to understand the physical lifespan of flash memory devices compared to other storage formats. Memory cards use compact flash controllers that experience natural wear over hundreds of write cycles, unlike heavy-duty solid-state drives and flash architecture built for constant daily abuse. Retiring older camera cards after a couple of years of heavy use reduces the risk of sudden hardware failure during memorable events. Treating memory cards as expendable tools keeps your primary photo library secure.
Do not overlook the value of keeping your camera and card reader hardware running smoothly. Device manufacturers frequently release firmware updates that address card compatibility bugs and improve power distribution over USB ports. Learning the benefits of updating your hardware firmware regularly helps you prevent technical communication glitches between your devices and your storage cards. A smooth connection ensures clean write cycles every time you shoot.
When traveling, store your memory cards inside water-resistant, shockproof hard cases instead of loose in your camera bag. Loose cards collect static electricity from fabrics, and sudden electrostatic shocks can fry delicate controller circuits instantly. Keeping cards shielded from extreme heat, moisture, and dust extends their operational life significantly. Simple physical care goes a long way toward safeguarding your irreplaceable snapshots.
Action Plan: Moving Forward with Confidence
Facing an unreadable memory card is an intimidating hurdle, but you now hold the exact blueprint needed to recover your lost images safely. You know that formatting is a trap designed for blank media, not for cards filled with precious personal memories. By locking down the card against new writes, assigning fresh drive paths, and letting non-destructive scanners do their job, you can rescue your photo collection without spending a fortune.
Take a deep breath, gather your card reader, and follow each step patiently without rushing. Every file has a digital footprint, and taking a calm, methodical approach is what brings those missing snapshots back to life. You have the tools, the knowledge, and the exact steps to reclaim your digital memories today.
I have stood in your exact shoes, watching an empty folder screen with a sinking feeling in my stomach. Trusting this patient, step-by-step process allowed me to bring back every single wedding photo I thought was lost forever. Stay calm, avoid the format button, and take pride in knowing you can rescue your own memories with your own hands.
Everyday Questions About Memory Card Photo Recovery
Can I recover my photos if my SD card shows as RAW in disk management?
Yes, a RAW status simply means the operating system can no longer read the file system index. Your actual image data remains safely stored inside the memory sectors. Dedicated raw signature scanning utilities can bypass the corrupted index and rebuild your pictures cleanly.
Will putting my SD card in the freezer help recover lost photos?
Freezing memory cards is an outdated trick that applied only to older mechanical hard drives with stuck bearings. Doing this to an SD card introduces harmful moisture and condensation that can short out internal electronic circuits. Keep your memory card dry and at normal room temperature during all recovery steps.
Why do some recovered photos only show half an image or gray boxes?
Gray blocks occur when parts of the image file were fragmented or overwritten before the recovery scan began. Standard JPEG files need all data packets aligned in sequence to render the complete photograph. When sectors are skipped or missing, the viewing software fills the blank space with solid gray.
Is it safe to continue using an SD card after recovering deleted pictures?
You can reuse the card only after performing a full overwrite test to ensure no bad sectors exist. Once your recovered photos are safely backed up on your computer, format the card thoroughly inside your camera before taking new shots. If the card ever throws another format prompt, discard it immediately and replace it.
Disclaimer
The recovery methods, system diagnostic instructions, and data preservation advice presented in this guide are intended solely for educational and informational purposes. While these techniques are based on standard digital storage practices, data recovery outcomes vary depending on hardware health, the extent of flash sector wear, and previous write activity. Always handle delicate storage devices with care, and consider professional cleanroom recovery services if your storage media exhibits severe physical damage or electrical burning.